-

- Sopto Home
-

- Special Topic
-
- Multiplexer Knowledge
-
- How to Install CWDM Mux Demux Module into the Enhanced Managemen

Multiplexer Knowledge
- Why is Multiplexing Needed in Data Communication Systems?
- What is Concept of Multiplexing in Telephone System?
- What is Digital TV Frequency?
- Outlook of the WDM Networks
- DWDM Technical Overview
- CWDM Technical Overview
- How to Activate Cable Modems?
- How to Install a Fiber Optic Modem?
- How do I Choose a Best Fiber Modem?
SOPTO Special Topic
Certificate
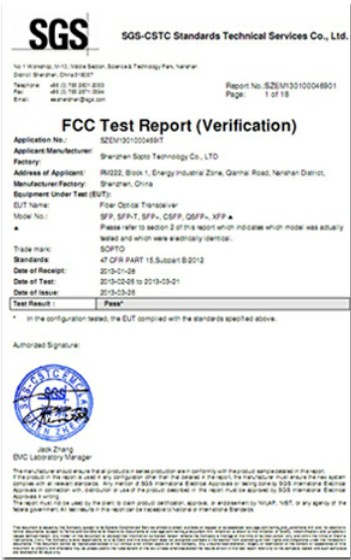

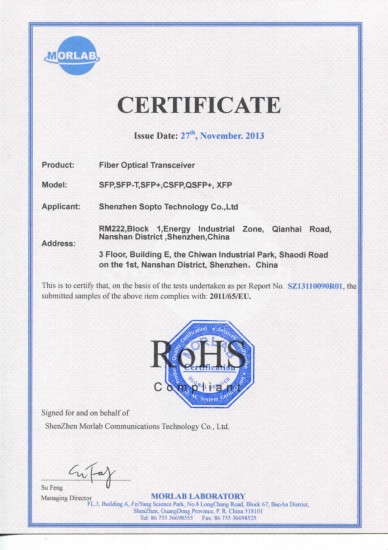
Guarantee
Except products belongs to Bargain Shop section, all products are warranted by SOPTO only to purchasers for resale or for use in business or original equipment manufacturer, against defects in workmanship or materials under normal use (consumables, normal tear and wear excluded) for one year after date of purchase from SOPTO, unless otherwise stated...
Return Policies
Defective products will be accepted for exchange, at our discretion, within 14 days from receipt. Buyer might be requested to return the defective products to SOPTO for verification or authorized service location, as SOPTO designated, shipping costs prepaid. .....
Applications
Multiplexers can be used to connect PBX, Hot line and other devices of network from central site to user site through fiber optical cable.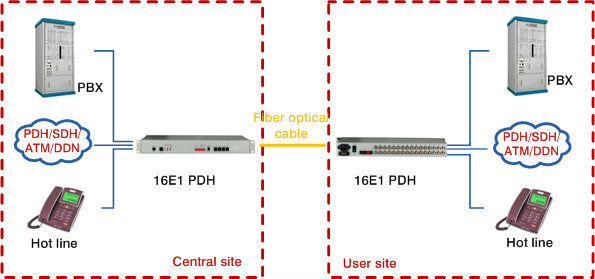
SNS Page


SOPTO Products
- Fiber Optic Transceiver Module
- High Speed Cable
- Fiber Optical Cable
- Fiber Optical Patch Cords
- Splitter CWDM DWDM
- PON Solution
- FTTH Box ODF Closure
- PCI-E Network Card
- Network Cables
- Fiber Optical Adapter
- Fiber Optical Attenuator
- Fiber Media Converter
- PDH Multiplexers
- Protocol Converter
- Digital Video Multiplexer
- Fiber Optical Tools
- Compatible
Related Products
Performance Feature
High integration desig
Low power consumption
Good EMC, EMI
Stable and Reliable
Multiplexer Knowledge
Recommended
How to Install CWDM Mux Demux Module into the Enhanced Management Frame?
This article describes the recommended procedure for installing CWDM MUX / DEMUX modules into the Enhanced Management Frame (EMF). This procedure assumes that the housing assembly has already been installed into the frame per the instructions provided with the housing.
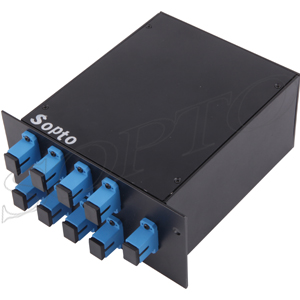
CWDM Mux and Demux and OADM Module
WARNING:
Never look directly into the end of a fiber that may be carrying laser light. Laser light is invisible and can damage your eyes. Viewing it directly does not cause pain. The iris of the eye will not close involuntarily as when viewing a bright light. Consequently, serious damage to the retina of the eye is possible. Should accidental eye exposure to laser light be suspected, arrange for an eye examination immediately.
Install CWDM Modules Steps:
Step 1: Determine the location for installation of the module.
Step 2: Slide the module into the slot as shown in Figure 1.
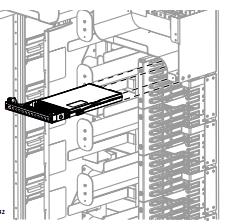
Figure 1 Install Splitter Module
Step 3: Refer to the designation label attached to the handle to verify you are installing the appropriate module for your application (Figure 2).
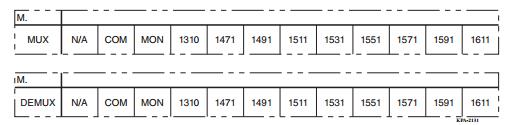
Figure 2 Port Designations
Connect Jumpers to CWDM Modules Steps
Step 1: Pull module out to detent position (Figure 3).
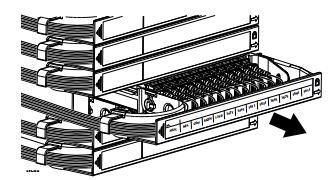
Figure 3 — Pull Module Out
Step 2: Press buttons on each side of the module (Figure 4) and lower the handle.
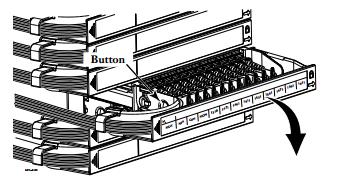
Figure 4 — Lower Handle
Step 3: Remove dust caps and clean adapters and connectors per standard company practice.
Step 4: Refer to the designation label (Figure 2) on the handle of the module for the port designations to determine where your jumpers should be connected.
NOTE: The first port on the left is empty and not available for use.
• Connect the common port jumper to the port labeled “COM.”
• Connect the remaining jumpers to the applicable port with the desired wavelength as shown on the designation label.
• To monitor the module, insert a test jumper into the port labeled “MON.”
Step 5: Connect jumpers (Figure 5) as required.
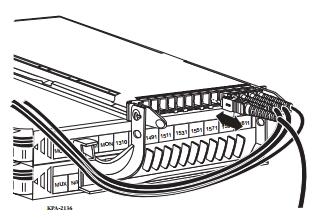
Figure 5 — Connect Jumpers
Step 6: Raise handle. Dress jumper cords (Figure 6) to the side of the module.
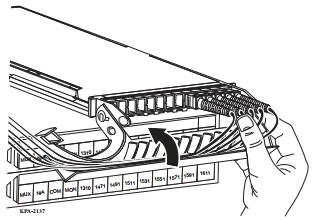
Step 7: Push module back into the housing and dress jumper cords in frame as described in the installation instruction provided with the housing.
For purchasing more high quality mux demux products with low cost or for more products’ information, please contact a Sopto representative by calling 86-755-36946668, or by sending an email to info@sopto.com.