-

- Sopto Home
-

- Special Topic
-
- Twinax Cable Knowledge
-
- How to Make Your Ethernet Crossover Cable?

Twinax Cable Knowledge
- Cable Labeling as Part of Data Center Management
- How to Correctly Run cables On Servers in a Data Center?
- 4 Realities You Should Consider 10G Ethernet for Your Business
- Is it finally the end of copper?
- Why We Need Both 40G and 100G Ethernet Cable?
- What is Twisted Pair Cable?
- Benefits of Twisted Pair Cable Construction
- Why Copper Is Used in Cables?
- A Brief Look at Ethernet Cable Construction
SOPTO Special Topic
Certificate

Guarantee
Except products belongs to Bargain Shop section, all products are warranted by SOPTO only to purchasers for resale or for use in business or original equipment manufacturer, against defects in workmanship or materials under normal use (consumables, normal tear and wear excluded) for one year after date of purchase from SOPTO, unless otherwise stated...
Return Policies
Defective products will be accepted for exchange, at our discretion, within 14 days from receipt. Buyer might be requested to return the defective products to SOPTO for verification or authorized service location, as SOPTO designated, shipping costs prepaid. .....
Applications
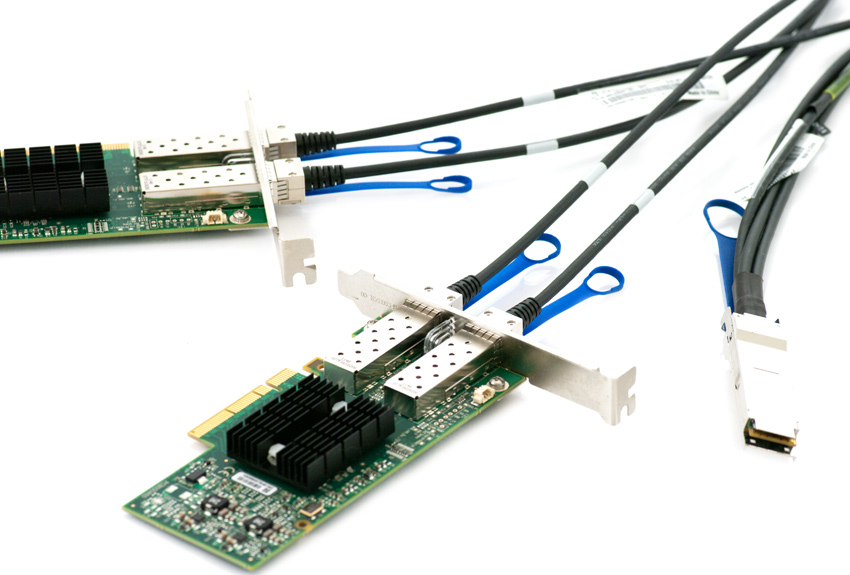 Twinax Cables are mainly used with PCI or PCI-E Card for the short distance interconnection in the server room.
SNS Page


SOPTO Products
- Fiber Optic Transceiver Module
- High Speed Cable
- Fiber Optical Cable
- Fiber Optical Patch Cords
- Splitter CWDM DWDM
- PON Solution
- FTTH Box ODF Closure
- PCI-E Network Card
- Network Cables
- Fiber Optical Adapter
- Fiber Optical Attenuator
- Fiber Media Converter
- PDH Multiplexers
- Protocol Converter
- Digital Video Multiplexer
- Fiber Optical Tools
- Compatible
Related Products
Performance Feature
Stable Transmission Speed
Reliable Transmission
Various Length Selection
Wider Operating Temperature
Good for HPC
Good for Data Center
Twinax Cable Knowledge
Recommended
How to Make Your Ethernet Crossover Cable?
An Ethernet crossover cable is a type of Ethernet cable used to connect computing devices together directly. Normal straight through or patch cables were used to connect from a host network interface controller (a computer or similar device) to a network switch, hub or router. A cable with connections that “crossover” was used to connect two devices of the same type: two hosts or two switches to each other. Owing to the inclusion of Auto-MDIX capability, modern implementations of the Ethernet over twisted pair standards usually no longer require the use of crossover cables.
This how-to is for all of you that enjoy the DIY your Ethernet Crossover Cable or has more time than money. It is far easier to buy a ready-made cable but not near as fulfilling. Plus, there are those times when you need a cable now and can’t get a ready-made quick enough.
You will need a length of network cable (UTP-Cat5), preferably a factory assembled straight through cable that comfortably reaches each computer. Be careful and measure accurately you would hate to find out that following the baseboard of the wall you end up two feet short. On the other hand you don’t want to use a fifty foot cable to connect two computers ten feet apart. Ethernet does not like coiled up excess cable. Consider making the cable with enough slack to allow servicing the computer without needing to unplug the cable.

The hardest part for most people will most likely be finding the RJ45 cable connectors. Check with your local computer stores that do network installations, most techs will give you a couple if you ask. Otherwise you will have to buy a five or ten pack. Make sure you get at least two, three is better. That way if you mess up you can just cut off the bad end and try again. Cut off the RJ45 connector from one end of the cable and prepare the end for the new RJ45 connector. I don’t use measurements for stripping the cable end, I start by stripping at least 1 inch of the main cable insulation and then carefully trim the eight internal wires using the factory assembled end as a guide to the proper length. Just make sure that each wire is equal length and that the connector cable lock pinches the main cable insulation.
You don’t need any fancy crimping tools to make one cable, just one normal size screw driver and one small screwdriver with a blade the same thickness’ of the brass conductors in the RJ45 connector. You may need a second pair of hands to help hold the cable and RJ45 connector while you or your helper secures the connector cable lock. It’s a little tricky to get all the wires into the proper holes but with a little patience anyone can do it. When it comes time to securing the connector cable lock use the normal size screwdriver that fits into the connector cable lock slot. It doesn’t take a lot of pressure to seat the cable lock just tap lightly until the cable is secure.
Note: Make sure ALL wires are pushed completely into the connector before seating the connector cable lock.
Once the connector cable lock is secure it’s time to move on to seating the brass wire conductors. This is probably the most tricky part, each wire has a separate brass conductor that needs to be seated to make contact with the wire. Once again you will want a second pair of hands to hold the RJ45 connector while you or your partner carefully seats each of the brass conductors. Lightly tap each conductor down with the small thin screwdriver to just below the plastic ridge, use the factory assembled end of the cable as a guide for how deep to seat the brass conductors.
Note: A pliers can be used to press down all the brass conductors at one time to the plastic ridges, then use the small thin blade screwdriver to finish seating to the proper recessed level.
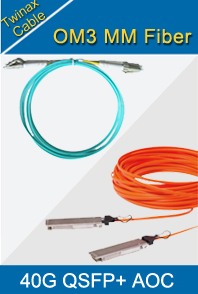
Sopto supplies high quality twinax cables, like SFP+ cables, XFP to XFP cables, 40G QSFP+ cables, for 10G Ethernet application. For more info, please browse our website. For purchasing more fiber optic assembly products, please contact a Sopto representative by calling 86-755-36946668, or by sending an email to info@sopto.com.